How to Create Free Fire Glowing Text and Skull Face Video Editing in CapCut
Hello everyone! Welcome back to another exciting tutorial. In today’s post, I’ll show you how to create those trending Free Fire glowing text and skull face video edits that are going viral on Instagram Reels and YouTube Shorts right now. The best part? You can make these videos easily using the CapCut application — no expensive software needed!
So make sure you read this article till the end because I’ll guide you step by step — from setup to adding the final glowing effects.
Step 1: Set Up the CapCut App
First, ensure you have the latest and working version of CapCut installed on your phone. If the app isn’t working in your region, connect to a VPN. You can find free VPNs like Turbo VPN or Hotspot Shield on the Google Play Store.
After connecting to a VPN, open the CapCut app. You’ll see the main interface. Tap on ‘New Project’ and select the video you want to edit. Once added, you’ll have your raw clip ready for editing.
Step 2: Adjust Aspect Ratio
Next, select the proper aspect ratio for your video. Tap on the ‘Ratio’ option — you can choose between 9:16 (for Reels/Shorts), 16:9 (for YouTube), or keep it ‘Original’. For this tutorial, we’ll use the original ratio.
Step 3: Add Glowing Text
Now it’s time to add the glowing text that makes your video look dynamic and professional. Follow these steps:
- Tap on the ‘Text’ option → then ‘Add Text’.
- Type your caption according to your video’s moment — e.g., “Wait for the Headshot” or “Watch the Twist”.
- Select your favorite font. Bold, clear fonts work best for gaming edits.
Once done, go to the ‘Style’ tab to add the glowing effect:
- Enable the Glow option and increase intensity.
- Add a shadow (preferably black) to give depth.
- Apply multi-color text by long-pressing individual letters and changing their colors manually.
For reference on modern glowing text ideas, check out Behance or Dribbble for creative design inspiration.
Step 4: Add Text Animation
Now add animation to your glowing text. Tap on ‘Animation’ → ‘In’ and choose a simple entry animation like Wiping In. For the exit animation, use Fade — it gives a smooth transition.
Keep the speed moderate; too fast can ruin the cinematic look. You can manually adjust the position of your text to align with the scene (top, center, or side of the video).
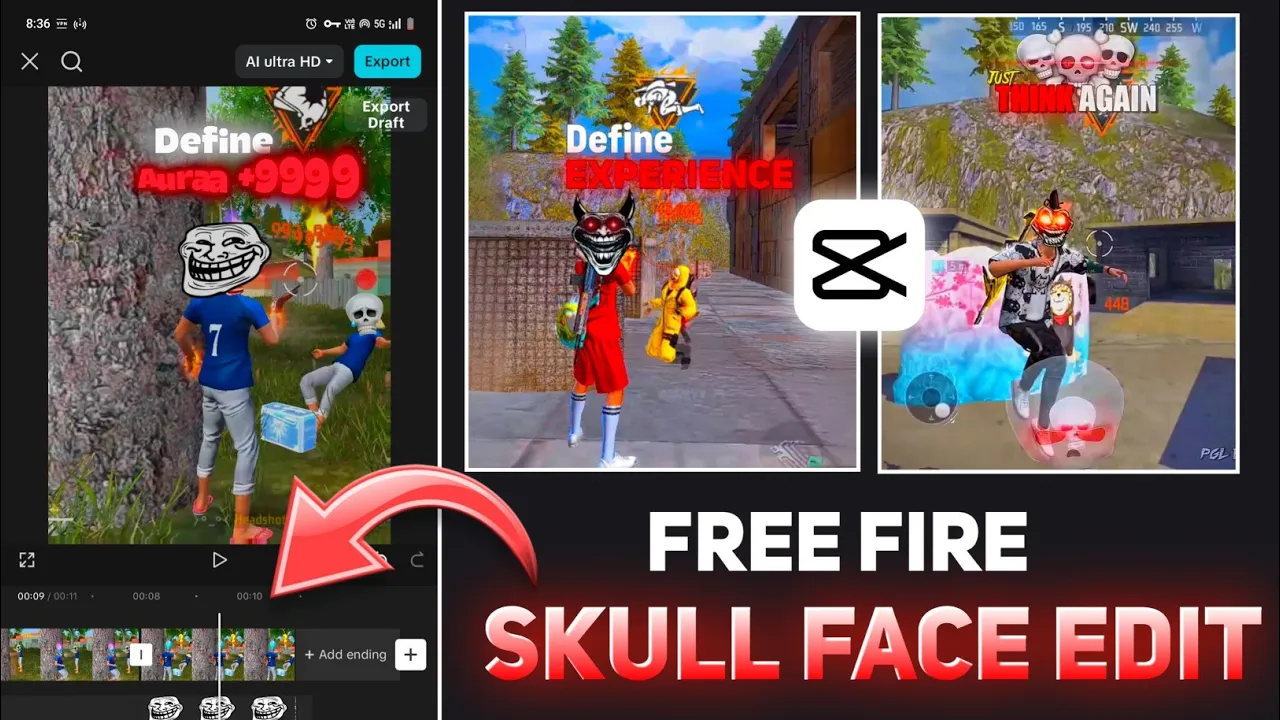
Step 5: Add the Skull Face or Troll Face Effect
To make the video more fun and trending, let’s add the skull face or troll face overlay. Here’s how:
- Freeze the frame where you want the effect to appear (use the ‘Freeze’ option in CapCut).
- Delete the next part of the clip to isolate that moment.
- Tap on ‘Overlay → Add Overlay → Photos’.
- Select a Skull Face or Troll Face image from your gallery.
You can find free PNG overlays from sites like CleanPNG or Pixabay. Adjust the overlay size and position to match the character’s face.
Then, add an animation to the overlay. Search for ‘Unfold’ or other dynamic effects in the animation section and keep the duration around 0.3 seconds for best results.
Step 6: Add Video Effects
To make your scene more dramatic, apply effects like Shake or Black Flash from the “Video Effects” section:
- Go to Effects → Party → Shake and reduce intensity for a subtle impact.
- Add Black Flash for a cool, energetic transition during the headshot scene.
Apply these effects to all layers — including the skull face overlay — for a cohesive look.
Step 7: Add Music and Beat Sync
Music brings the entire edit to life. Tap on ‘Audio → Sounds → Your Device’ and choose your favorite background track. You can also download trending gaming sounds and troll-face music from TikTok Sounds or royalty-free libraries like Uppbeat and Pixabay Music.
Once added, mark beats manually by listening to the track and tapping the ‘Add Beat’ option where the music drops. Align your troll or skull face animation exactly at these beats to make the video look professional.
Step 8: Export the Final Video
When you’re done with all the effects and animations, tap on Export. Set the resolution to 1080p or 4K for the best quality. Once exported, share it on Instagram Reels or YouTube Shorts to showcase your creative editing skills!
Final Thoughts
That’s it! You’ve successfully learned how to create Free Fire glowing text and skull face video edits using CapCut. These types of edits are extremely popular on social media because of their dynamic energy and troll-style humor.
If you want to download the resources, overlays, or music used in this tutorial, join our Telegram channel or WhatsApp community for free files and editing materials.
We’ll meet again in the next tutorial with another trending CapCut video editing guide. Until then — keep creating, stay happy, and keep spreading good vibes! 🎬🔥
Join Our Prompt Community!
Get daily AI prompts, tips, and tricks directly in your WhatsApp.